Attumen and his steed Midnight lie dead among the dry straw littering the floor of Medivh’s stable, and you and your allies have plundered his remains for valuables. You now have two directions to choose from: return the way you came, or push on one room further to a friendly ghost of a blacksmith, who can offer repairs to anyone who is at least of honored reputation with the Violet Eye (the faction that wants you to invade Karazhan every week and offers you quests from just outside the entrance). Clear to him if most of your raid is honored to save time repairing later. Once you’ve cleared to the blacksmith, you will be able to reach him unimpeded until the instance resets on Tuesday.
It is my belief that the blacksmith is cursed: if you skip him thinking "Nah, we won't need to repair" then your group, no matter how skilled and geared and experienced, is doomed to wipe until your gear breaks. One way or another, he will use his voodoo to ensure that you clear to him, so you might as well just get it over with and stop trying to cut corners.
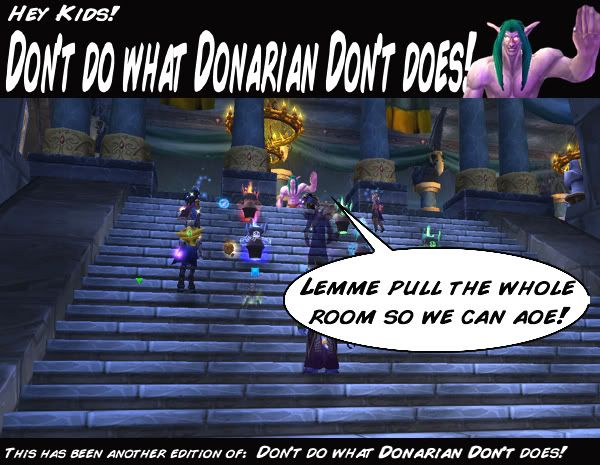
Once you’ve finished with the cursed blacksmith, head back the way you came, following the spiral stables back out to the main entrance. From here, climb onto the platform where the ghostly butler stands, and continue up the wide flight of stai-STOP. Stop right there. Only go about 2/3 of the way up the staircase. Near the top are hordes of ghosts just waiting for you to get a bit too close and wipe your unprepared raid. Play it safe and don’t approach the top just yet. Unless you are the tank, you should hang out on the stairs until you’ve cleared enough of the trash to proceed safely.
Over the top of the stairs are two types of pulls: large groups of non-elite ghosts and single elites that patrol the large rectangular room at the top of the stairs. Your main tank should pull one of these onto the stairs at a time, being careful to avoid getting an elite and an aoe pack at the same time. We like to use raid labels (the skull, moon, and other assorted lucky charms available to the raid leader to put over a unit’s head if you right-click a targeted unit’s unit frame) to keep track of the roving elites. For the non-elite groups, give your tank and offtank a moment to build aggro on the entire group, then unleash your aoe attacks. Healers should be at the ready with quick heals to protect the squishier dps classes that may come under attack. If you have a mage, they probably will die at least once on these stairs. The single elites are easy tank-and-spanks with no special abilities to speak of.
Your tank should first clear out the left side of the room, which usually takes 4 or 5 pulls total. Then, the tank should carefully sneak to the left into Moroes’ room, which is a rectangular space full of long dining tables. Sitting at each table is a group of non-elite diners being served by roving elite skeletal waiters. Your tank should pull the groups from the tables near the entrance to this room back to the stairs, and also separately pull any skeletal waiters that patrol near the entrance. The diners are the same as the previous non-elite groups except some of them have ranged attacks. Meanwhile, the waiters add a wrinkle with their “brittle bones” debuff that reduces the tank’s armor to (ahem) zero. This will probably necessitate some extra healing attention.
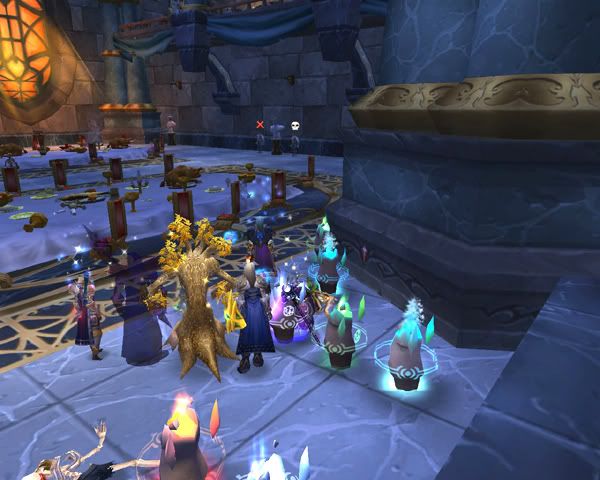
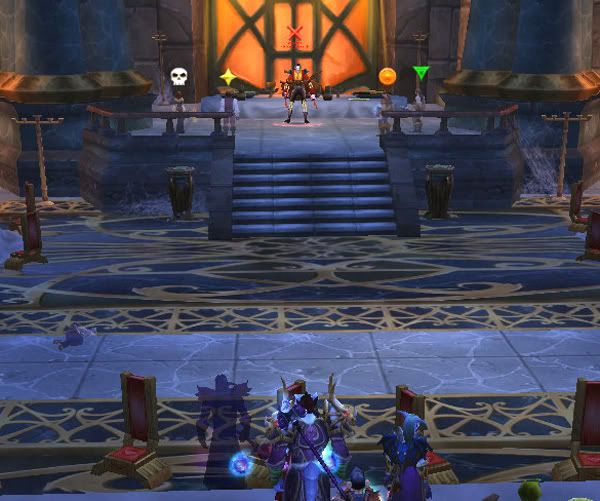
Once the near half of Moroes’ room is clear, your entire raid should carefully climb to the top of the stairs (stay left!) and sneak along the wall to the left into the next room. As you walk into the room, you’ll see that you are entering from right side, meaning that there is a wall nearby to your right and the room expands out to your left. Stay along the wall and head left, parking your group between the two columns along the room’s back wall. This is what you should be looking at:
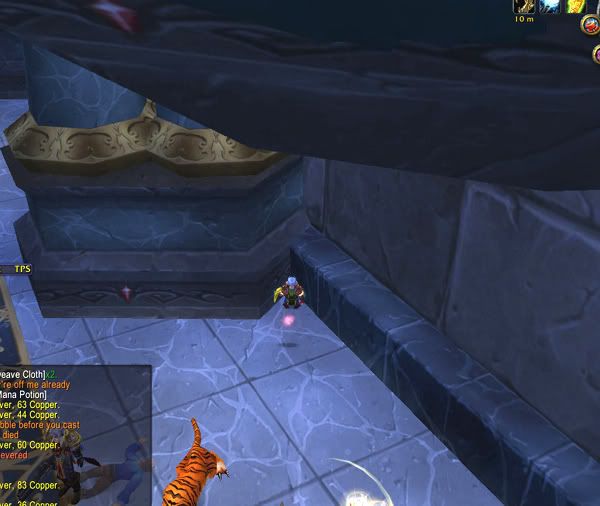
You should have two aoe groups and one or two skeletons left in front of you to clear. Since some members of the diner groups have ranged attacks, your tank will have to cheat a little in order to get them clumped together for easy victimization. Once your tank has their attention, she can wedge herself into the corner where the column meets the back wall (see image). If done correctly, the curve of the column will be just enough to break line of sight with the ghosts and force them to run into melee range.
Once you’ve cleared the diners and waiters, you still have one more job left before fighting Moroes. Far off to the left and right sides of the room are pairs of Ghostly Stewards that you need to clear. They pull in pairs, and each one of them hits considerably hard. A good way to deal with this is to use two tanks, who each pull one of the guards simultaneously. Then, you lower the risk that your one tank will take too much damage too quickly. Focus-fire down your offtank’s target first, since your main tank will have an easier time staying up. Sounds easy enough, right?
Nope.
Some would say that getting drunk is dangerous. Others, like me, might say that getting drunk can be a good time.
Well, as it turns out, in this case those other people are right. You see, the Ghostly Stewards carry bottles of liquor, and around 30% health, they will use that bottle to perform a move called “Drunken Head Crack”. This is even worse than it sounds, especially because the Stewards will enrage a few seconds later. The Head Crack will not only make your tank stinking drunk (I assume the alcohol seeps through the crack in the skull and goes directly to the brain?), but also unable to dodge, block, or otherwise avoid attacks. In concert with enrage, this will cause your tank to start taking piles of unavoidable damage to the tune of around 4000 HP per now-accelerated hit. No tank can stand this for long.
There are two things you can do to deal with this. First, you need alert healers. They all should be ready to spam heals fast and hard as soon as they see one of the Stewards drop below 40% health. Second, the Stewards can be disarmed, preventing them from using special moves. If your tank disarms the Steward at around 50% health, you won’t have to worry about the Head Crack. Unfortunately, this option is only available to warrior tanks.
Whew! Ok, so you’ve cleared the room and hopefully survived getting drunk (just like college!). Now it’s time to turn your attention to the dias and prepare for the world’s most conscientious undead rogue:
Moroes
Moroes is a polite guy. Unlike other undead rogues, who will likely spam a /spit macro after ganking you, Moroes prefers to fret over the mess he’s made (with your blood) after he’s stabbed you in the back and wrung your neck.
He’s even friendly: as in, he’s got a posse of ghost minibosses up on the dias with him, all of them eager to make a mess out of your raid group as well. Let’s see how they stack up:
Moroes’ “Rogue’s Gallery” (I’ve been dying to use that joke!)
Though Moroes has 6 undead friends, he only has 4 of them over for dinner at a time. Which 4 adds you will see will be randomly generated every week, so there’s no predicting which ones you will face. Like Moroes, each add is analogous to a certain WoW class/spec combination.
- Baroness Dorothea Millstipe
Shadow Priest
KILL HER FIRST. She can mana burn your healers, guaranteeing a wipe. She’s in cloth, so she should go down easy. No need to tank her, though you should toss some heals to whoever she is hitting. Like all of the adds, is stunnable. - Baron Rafe Dreuger
Retribution Paladin
Freezing trap him, but don’t let him get close enough to stun. His plate makes him slow to die, and he has some damage potential, so CCing him until after Moroes is dead is generally recommended. - Lady Catriona Von'Indi
Holy Priest
Another clothie who can easily be killed early. Her main threat is healing, so interrupting her heals or keeping her CCed should be a priority. - Lady Keira Berrybuck
Holy Paladin
She will dispel the crowd control off of her allies, so she MUST be stopped. Since she can cleanse between Freezing Traps or while being killed (and she is in plate), she should be your #1 candidate for shackle. - Lord Robin Daris
Arms Warrior
This &$@%ing bastard will 1-shot clothies, but he’s also slow to die. He will require a tank when you kill him, and is dangerous to try to shackle because of his high damage. I recommend you have a hunter ice trap him while keeping far, far away. - Lord Crispin Ference
Protection Warrior
This guy is the lowest priority, as his damage is barely noticeable. He is just very hard to kill. You either want to keep him CCed the whole fight, or have the offtank keep aggro on him (works great as a rage battery!) if your healers can handle it. He should always be killed last.
Once you’ve identified which guests Moroes has over for dinner tonight, you’ll have to hatch a battle plan that involves killing some of them, and crowd controlling others. In most situations, you will be immediately burning down one guest while shackling/ice trapping/paladin fearing the others. Depending on who you get and your group makeup, you may also kill a second target before turning to Moroes. Also note that an add can be kited by a skilled hunter, mage or warlock, and that if any adds exit the room, the encounter resets (so be careful with your pally fears!).
The Fight
Tank Moroes off to the left or right side or the room to give CCers a wide area to control their targets without getting close to Moroes. It can be beneficial to have the ranged members of your raid stand clumped together on the large table. This will prevent issues with mobility and line-of-sight. If they are all clumped together, then it is easy to predict where CC targets will go if they break free. If you have a hunter who isn't already using her freezing trap, have her lay one between the caster group and the CC targets. That will provide an extra buffer of protection for your squishies if a shackle gets resisted.
Moroes himself requires two tanks at all times. He will occasionally gouge (disorient) the main tank, and make a beeline for whoever is second on the aggro list (hopefully the offtank). He will also periodically blind (this is a disorient effect as well) the closest person to him who is not currently his aggro target. Be prepared for the possibility that he may blind the off tank, then immediately gouge the main tank and attack a third target. You can mitigate this by having a dps character stand right on top of Moroes, while the offtank stands as far away as she can while still fighting. That way, the dps character will be blinded instead.
But this is not the only reason your healers need to be alert. Every 30 seconds, Moroes will vanish. A few seconds later, he will reappear behind a random target in the raid and garrote them before returning to whoever had his aggro before he vanished (his own vanishing does not wipe his aggro). Garrote is a massive, long-lasting dot. It will tick for 1000 damage every 3 seconds, and last for five minutes. No, you didn’t read that wrong. Garrote cannot be dispelled by conventional means.
This essentially means that the fight is on a timer. You need to kill Moroes fast before the garrote damage runs your healers dry. Since garrote lasts so long, the healing burden will be compounded as more and more raid members have garrote ticking away on them. There are only 4 ways to remove garrote: Pally self-bubble, Pally Blessing of Protection, Mage Ice Block, and . . . death.
Paladins should self-bubble as soon as they get garrote, as should mages. Paladins should save their BoP for healers who get garroted. Do not waste a BoP on dps or a tank.
You will take no durability loss if you die from garrote, so dying on purpose can be a viable strategy. You can plan ahead by saving soulstones, ankhs, and battle rezzes for this fight. Dying will clear the garrote, and possibly restore some mana upon resurrection.
Oh yeah, and you’ll also have to deal with any damage that the adds are doing. Bet you’re looking forward to healing this fight, huh?
Garrote should disappear as soon as Moroes is dead, so at least you have that to look forward to.
Anything Special?
Priest: Shackle an add.
Hunter: Freezing Trap an add.
Paladin: Use Blessing of Protection to save healers from garrote. "Turn" an add if necessary. Use your bubble if you get garroted yourself.
Mage: Ice Block if you get garroted.
So in summary, CC 2-3 adds, kill 1-2 adds quickly, then go kill Moroes himself before moving on to the CCed adds. Please, please, please do not loot Moroes until everything is dead. You do not need a wipe with only one add left because everyone is drooling/arguing over a drop. Eventually, Moroes and his friends will be polite enough to lay down and hand over their personal belongings, perhaps including a nifty pocketwatch. Neat-o!
Next: You fight a 3-stories-tall, granite … pimp-bot.


No comments:
Post a Comment