
So you’ve got the gear. You’ve got 9 buddies. You’ve got an itch for teh epixx.
It’s time to go to Karazhan! Woooho-but wait…how do I get there?
Karazhan tower, the former home of Medivh The Last Guardian, is located in the south end of (not)scenic Deadwind Pass. To get there, Alliance should head to Stormwind and hitch a gryphon to Darkshire in Duskwood, then ride directly east to the pass. Horde have a more annoying trip from Orgrimmar to Stranglethorn Vale via zeppelin, then they must take a flight path to Swamp of Sorrows before riding west into the pass. Alternatively, Horde can fly across the entire continent from Undercity to Swamp of Sorrows. Once in the pass, either faction need only ride south past some vultures and then through an ogre encampment before arriving at Karazhan.
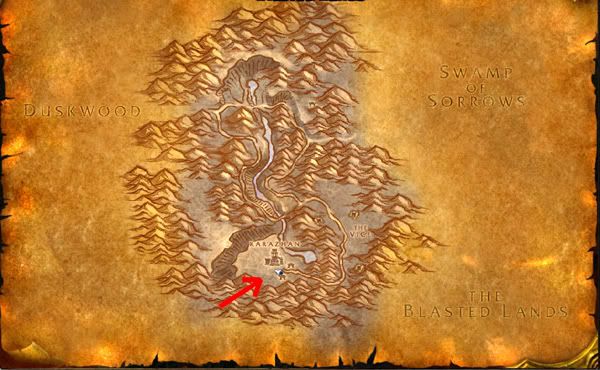
Or, if you’re lazy, let those other suckers in your raid summon you via the convenient summoning stone sitting just the left of the front door. Must have made it really easy for Medivh to hold dinner parties back in the day.
Open up the door with The Master’s Key (you are keyed, right? No, you cannot just run in after your friend opens the gate if you don’t have the key, Mr. Clever) and step through the swirly portal to enter the first room, which will serve as your raid’s staging area. To the right is a platform leading to a wide staircase, which you can ignore for now. The ghostly butler on the platform will never attack you, but he does have some interesting lore information about the tower on offer. I’m not going to focus on the lore, so look elsewhere if you want an explanation of why this place is full of ghosts and monsters (I’ve read up on it, and it still doesn’t make sense).
Before the platform, you will also see a small opening to the right. Do not go into this door. It leads to the Servant’s Quarters, which have become infested with bats, spiders and hounds. If you were to, in theory, go into those rooms and kill trash, you would eventually cause a random boss (either bat, spider or hound) to spawn. Killing this boss would net you an epic item with random attributes. This means that you are way more likely to get a belt “of spirit” or “of the eagle” than you are to get something remotely useful. This room is entirely optional, and is mostly a waste of time unless your group is severely undergeared. Its only use is as an easy source of reputation, but rep is easy enough to come by on normal runs. So yeah, don’t bother with this door.
Instead, focus your attention to the large opening to the left, which leads to the tower’s stables. Buff up and get ready to bust some ghosts!
Or ain't you 'fraid of no ghosts?
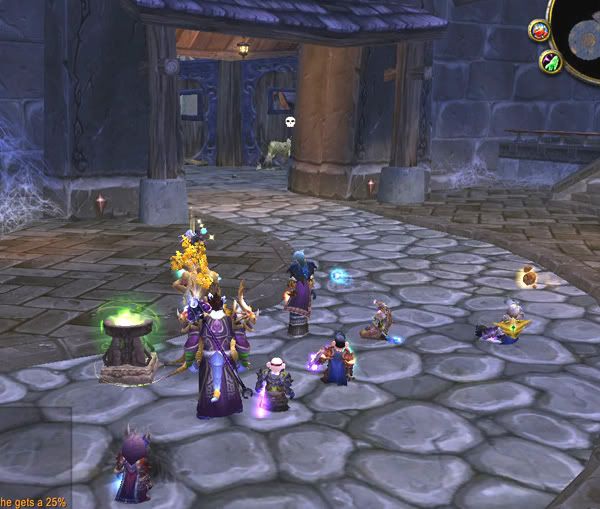
Attumen Trash
The stable is a spiral, and your goal is to work your way from the outside to the center, where Attumen the Huntsman and his steed Midnight await. Between you and the center are 5-6 groups of ghost horses and their ghostly handlers. Pull sizes will vary from 2 to 6 at once, tending towards the higher end. How you handle these pulls depends on your group makeup: any target may be shackled, freezing trapped, Paladin-feared, or offtanked. Priority for CC goes to the Stable Hands because they have this annoying habit of healing the horses.
Tank and beat down the horses first. The Spectral Chargers like to cast an aoe fear and/or charge a random raid member, forcing the tank to give chase and potentially wreaking havoc on your squishies, so be prepared for either. The charge can be avoided by standing close to the Charger.
For every set of trash and every boss, I’ll be listing, by class, anything unusual you should be doing on those pulls. If I don’t mention you, just continue to tank/heal/dps as normal. Because you’re not a special, unique snowflake.
Anything Special?
All: Cluster around the Chargers if possible.
Hunter: Chain Freezing Trap on your assigned CC target (if any).
Paladin: You may need to use “Turn Undead” on a CC target, depending on your raid makeup.
Priest: Shackle Undead, preferably a Stable Hand. Fear ward the raid, tanks and healers first.
Shaman: Tremor Totem
Once you get started, make sure you're clearing the trash at a brisk pace: unless Attumen is dead, this trash will respawn 25 minutes after it dies. The sooner you get through it, the more time you have to retry the boss before having to reclear the trash. This is partly meant to serve as a gear-check on your raid. If you aren’t strong enough to clear this trash and beat Attumen in 25 minutes, then don’t even try going up further. Respawns will not happen during the boss fight.
Once you’ve made the ghosts un-undead, you’ll reach the circular area in the center, you’ll see Midnight standing alone next to an old wooden cart. Rebuff and get prepared: approaching Midnight will begin the boss encounter.
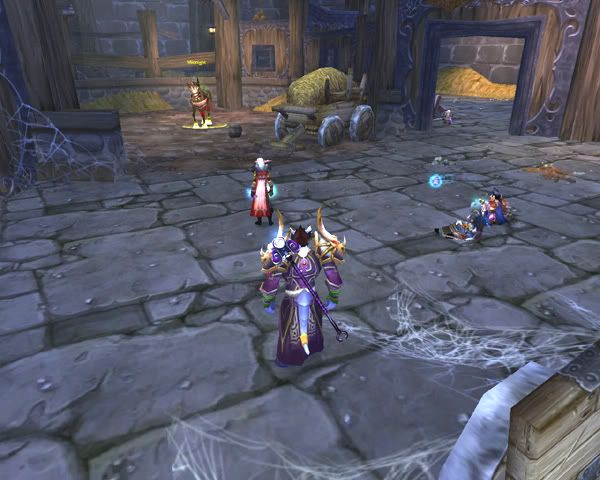
Attumen the Huntsman & Midnight
This fight has 3 phases and will require 2 tanks. This is because Midnight is not being entirely honest with you. He may be standing there looking all innocent, but in reality, his master is waiting to pounce on your raid.
For all bosses, I will be presenting only the strategy that my raid group has found most effective. There are definitely other ways to take down the bosses, but I’m only going to talk about the one I have seen work well firsthand.
Phase 1: Midnight alone
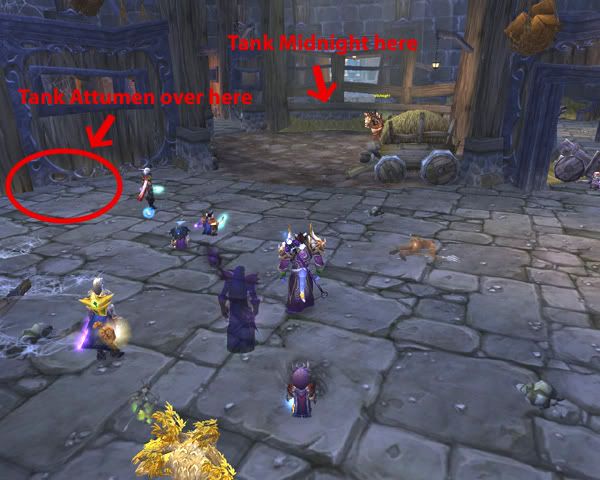
This phase will be very short. Just have your offtank run in and hit Midnight a few times before your dps opens up on him. Tank Midnight where he starts, near the cart. Your main tank should be building rage and keeping a very careful watch for Attumen to appear so he/she can snap the boss up immediately. When Midnight hits 95% health, Attumen will appear out of nowhere right next to Midnight.
Phase 2: Attumen and Midnight, separate:
Your offtank should continue tanking Midnight, and your DPS should continue hitting him. Attumen appears with a blank aggro list, so he will likely make a dash for your healers once he has phased in. Your main tank should be between Midnight and the healers, and should be watching carefully and pulling Attumen’s aggro immediately. Keep in mind that Attumen is immune to taunt, so open with a high-aggro move, like Shield Slam, instead. Since Attumen cleaves in an arc in front of him, your main tank should keep him facing away from the raid. It’s a good idea to simply move him off to the side. We like to tank him in the back left corner (see photo). Healers will have to manage healing on both the main tank and the offtank, making this the most healing-intensive phase.
Attumen can be disarmed, so it is recommended that you have a warrior tank him and use the ability every time its cooldown is up.
For the rest of the battle, Attumen will periodically cast an aoe curse that reduces chance to hit with all attacks by a brutal 50%. Your mages and druids should be constantly removing the curse from everyone, especially tanks. Warriors can Spell Reflect the curse, though this can be difficult to time.
Anything Special?
Druid: Remove Curse
Mage: Decurse
Warrior: Disarm Attumen
Phase 3: Attumen mounts Midnight
When Midnight reaches 25% health, Attumen will run over and mount his steed, turning them into a single boss mob. This mob’s health will be equal to the health of whichever of the two had more before they merged, so he will likely be near full. However, it would have been unwise to DPS both to around 25%, as Phase 3 is actually easier than Phase 2 - if you know the trick. And you are about to, my friend.
This new mob will spawn with a cleared aggro list, but the process takes a moment, giving the main tank time to get in position. The MT should immediately draw the boss’s aggro, and should be given a few seconds to build it before DPS begins. Like most Burning Crusade raid bosses, this guy is immune to taunt, so make sure you give the tank adequate lead time to build aggro. The boss should be tanked where Attumen was being tanked alone (in the back corner as pictured) and facing away from the raid.
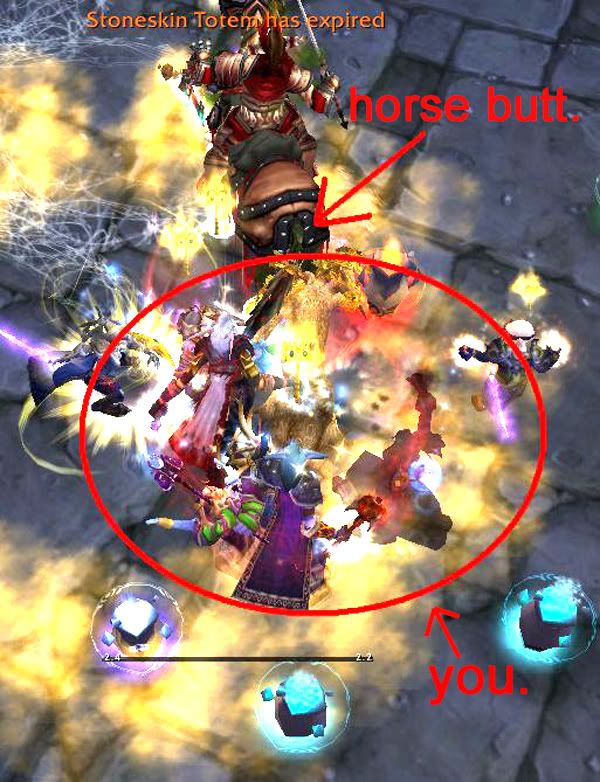
In Phase 3, the boss gains only one new move: he will periodically charge the member of the raid furthest from him, then run back to the tank. Since he can cleave while running back, this could prove devastating to the raid. However, as with the trash Chargers, this move has a minimum range. Simply have the entire raid bunch up directly behind the boss (Yes, even the hunters. Trust me, you'll live through the tiny hit you'll take on the damage meters by being in melee. It's OK. No, no, don't cry! [It may be that now that the deadzone has been reduced to almost nothing, hunters can use ranged attacks without being far enough away to trigger a Charge, but I haven't had a chance to test it]). Seriously, get in melee range of the horse’s arse. He will never charge, and this phase will be easy as pie with cake on top, especially if your warrior(s) remember to keep disarming the boss. Just keep it up until he dies.
Anything Special?
All but main tank: Bunch up in the horse’s butt.
Druid: Remove Curse
Mage: Decurse
Warrior: Disarm Attumen
------
Aaaaand you’ve beaten your first boss in Karazhan! Do a little dance, argue with your group over who gets the super-rare mount if it drops, then collect your epics! Congratulations!

Next: The only polite undead rogue in the whole world, and the only time I will ever admit that maybe getting drunk isn’t always a great idea.


No comments:
Post a Comment